

A tutorial on installing a CLI Wallet on Windows.
CLI Wallet with Kaspad
Now that we have gone through the process of syncing a kaspad node, we will create and use a command line interface(CLI) wallet using kaspawallet.exe in the list of programs in kaspad. While your node is active, open a new command prompt and navigate to the kaspad folder using the command “cd Desktop/kaspad,” as we did previously.
To display the available options and commands that can be used, run the command “kaspawallet.exe -h” which will show the help menu for kaspawallet.exe :

Before creating a new wallet, you can also type “kaspawallet.exe create -h” to access the options available for creating a wallet. For example, you can create a multi-sig wallet that different people can share and use. Our Kaspa community treasurers use a multi-sig wallet to manage the dev fund wallet payments.

To create a new wallet, run the command “kaspawallet.exe create.” You will be prompted to choose a password for the wallet, which you must never forget! If you do not trust your memory, write it on paper and keep it safe and secure. This will also create a new wallet file called “keys.json” in the AppData folder. You must also copy this file and store it appropriately.
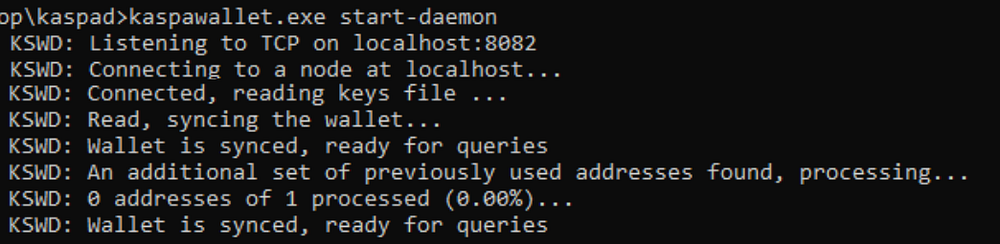
Once the wallet is created, open a new command prompt window and navigate to the kaspad folder again. Run the command “kaspawallet.exe start-daemon.” This will start the wallet daemon and synchronize your wallet with your kaspad node and, thus, with the Kaspa network. The daemon will continue to run while the cmd window stays open. Please do not close it or stop the daemon (using Ctrl+C) until you finish your actions on the wallet.
To manage your funds, return to the command prompt where the wallet was created or open a new one and go to the kaspad directory. You can then use the wallet commands. For example, “kaspawallet.exe balance -v” will display the balance of your wallet for each receiving address :

But we still need to create an address! Type “kaspawallet.exe new-address” to create one. You can then use this address to receive Kaspa coins! You can create as many addresses as you like.
If you want to try the amazing speed of Kaspa transactions, go to the faucet at https://faucet.kaspanet.io/. You can request a small transaction by pasting your new address and passing the captcha authentication. You should receive 0.09 KAS.
Now type “kaspawallet.exe balance -v” again :

Tada! You’ve received your first (pieces of) Kaspa! I will send them back to the faucet. Keep in mind that for every transaction, there is a 0.0001 Kaspa gas-fee/utxo sent. So, I can only send back 0.0899 KAS :

The send command needs additional inputs, including the receiving address “-t kaspa:****” and the KAS is given by “-v ****” The complete command “kaspawallet.exe -t kaspa:qzacs3vl34sswlmalkwkrc53c0kexrtnjxx3a6mkvs60r0qt7lauglmn08307 -v 0.0899” will send the Kaspa to the faucet after successfully entering the password.
And there you have it! Now you can receive or send Kaspa coins using your node and CLI wallet. Remember to never share your keys.json file or your password with anyone.
Tip: AvogHadro is a Community Helper in the Kaspa Discord. As an avid Kaspa supporter and crypto enthusiast, AvogHadro‘s knowledge and support is well respected and valued within the Kaspa Community.
Find me on the Kaspa discord — Bubblegum Lightning